Choosing the right sandbox setup transforms your outdoor space from ordinary to extraordinary. You face dozens of design possibilities, each promising to deliver both play value and visual appeal. Some homeowners lean toward simple wooden boxes, while others dream of elaborate play zones with tunnels, shade structures, and artistic touches.
The path you take shapes not just your yard’s appearance but also how your children interact with outdoor play for years to come.
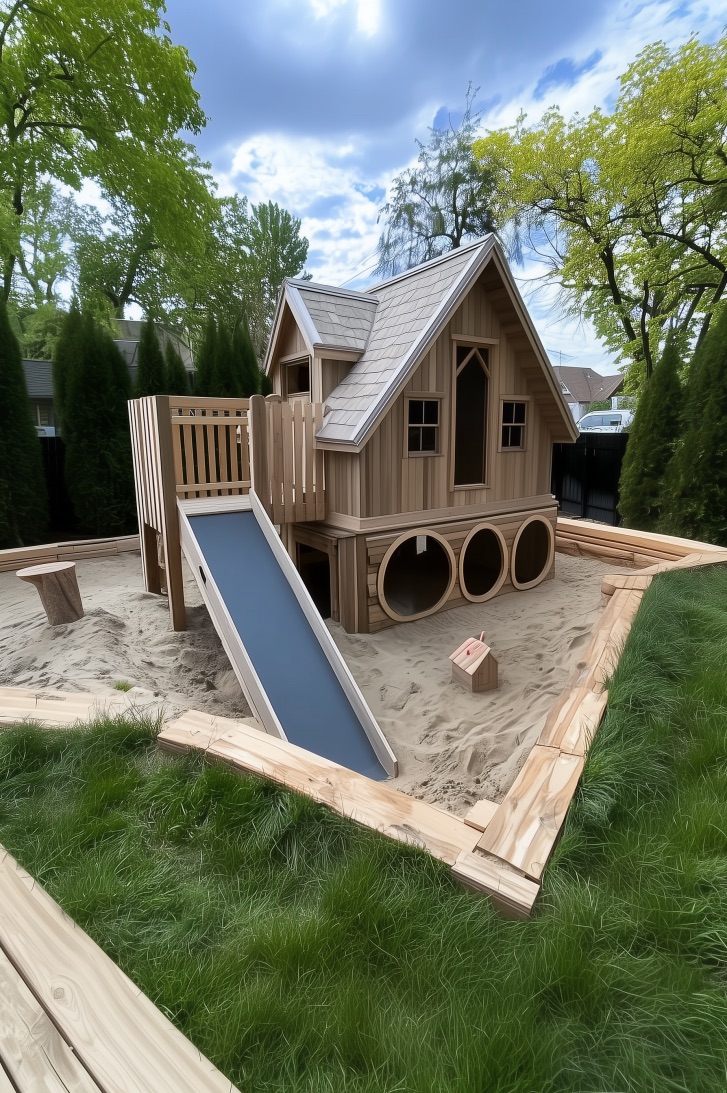
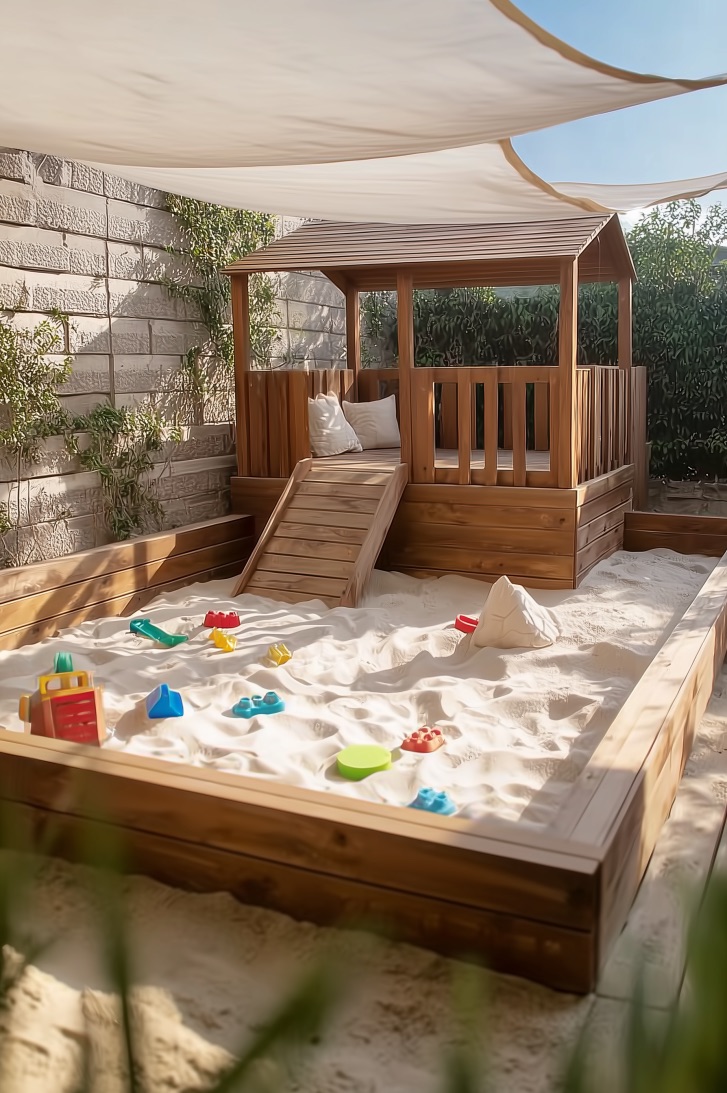
1. Build a Sandbox Under a Wooden Playhouse for Kids
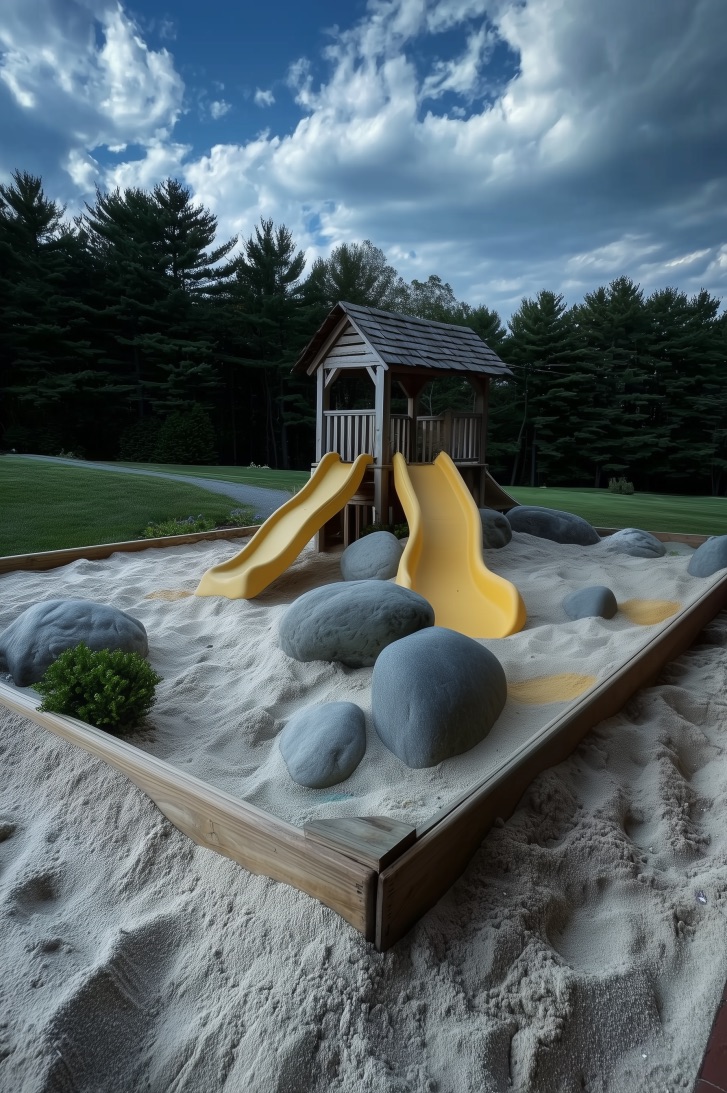
Stack play opportunities vertically and you’ll maximize every square foot of your backyard. A sandbox nestled directly beneath an elevated playhouse creates two distinct zones without claiming extra lawn space.
This layered approach turns ordinary afternoon play into miniature adventures. Kids scramble up ladder rungs to the upper deck, then slide back down to dig tunnels and build castles in the protected sand below. The playhouse roof provides natural shade during midday sun, keeping the sand cooler under bare feet.
Backyard designers increasingly favor these dual-function structures as suburban lots shrink. You’ll spot them in neighborhoods where families crave robust play equipment but can’t sacrifice entire yards to achieve it.
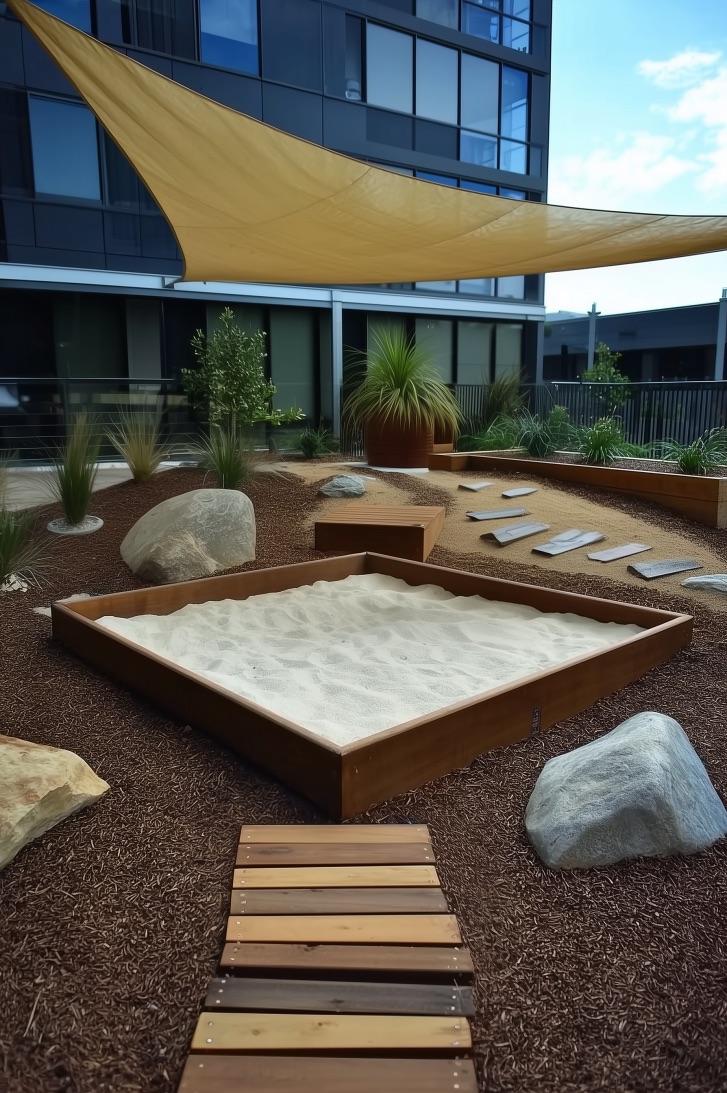
2. Install a Sun Shade Over a Backyard Sandbox for Toddlers
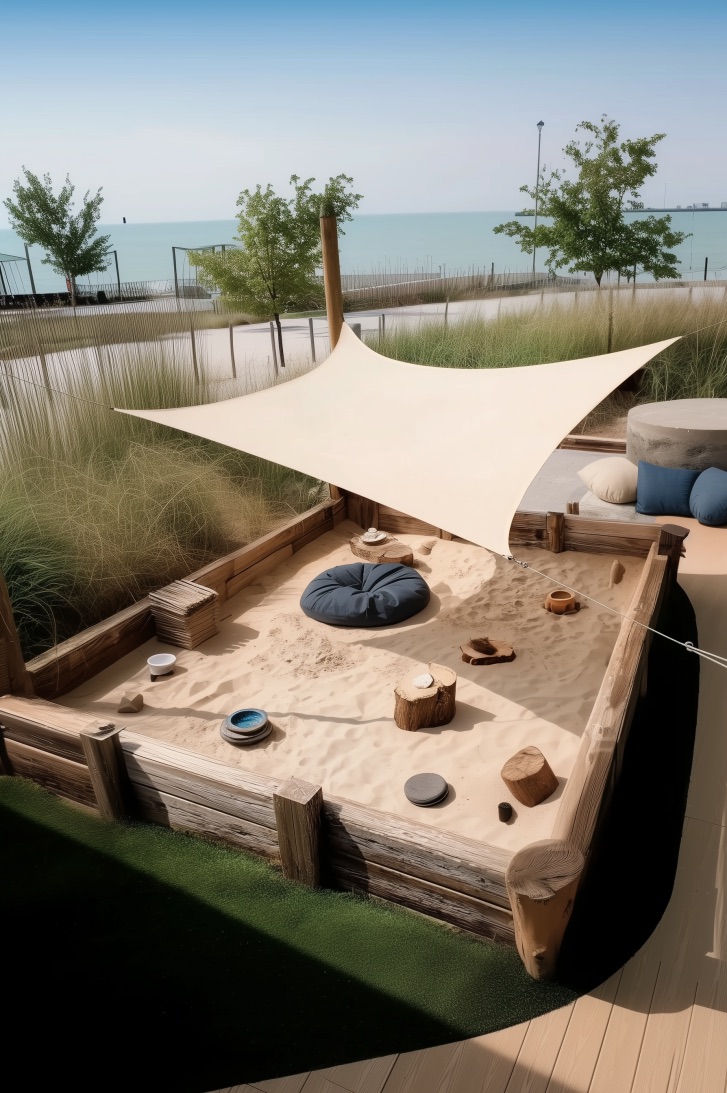
Many parents install elaborate sandboxes only to watch them sit empty during peak afternoon hours. Others discover their toddlers gravitate toward shaded corners of the yard, avoiding the bright sandbox entirely.
A retractable canopy or permanent sail shade solves this sun-exposure puzzle. Mount fabric panels on corner posts, angling them to block rays during the harshest hours while still allowing breezes to flow through. The shade drops sand temperature by fifteen degrees or more, making barefoot play comfortable even in July.
Adjustable designs let you shift coverage as the sun arcs across the sky, following your child’s play patterns throughout the day.
Be warned: skipping sun protection limits usable play time to early morning and evening windows. You’ll also face increased risk of sunburn during those moments when toddlers lose themselves in imaginative construction projects and forget to retreat indoors.
3. Incorporate a Wooden Tunnel for Creative Sandbox Play

Add a crawl-through tunnel along one sandbox edge. This simple structure instantly multiplies play scenarios.
Children treat tunnels as secret passages, dragon lairs, or mining shafts depending on the day’s imaginary world. The wooden arch frames sand on both sides, encouraging kids to transport buckets back and forth or create elaborate trade routes between imaginary kingdoms.
4. Integrate a Built-in Chalkboard for Outdoor Sandbox Art

You know that moment when your child abandons sand toys to draw diagrams in the dirt with a stick? That impulse to create marks and patterns runs deeper than simple digging.
A chalkboard mounted directly on the sandbox’s exterior wall channels that creative energy. Kids sketch treasure maps, then execute their drawn plans in the sand beside them. They draft architectural blueprints for sand castles before construction begins, or keep score during elaborate games that blend digging with storytelling.
The combination feels natural because both activities satisfy the same urge to shape raw materials into something meaningful. Sand yields to pressure from hands and tools; chalk responds to fingertip force against slate. Moving between the two mediums keeps young minds engaged longer than either activity would alone.
Mount the board low enough for kneeling access, and consider adding a rain gutter beneath to catch chalk dust. You might attach a small bucket for chalk storage, though pieces will inevitably migrate into the sand – a minor casualty of enthusiastic play.
5. Arrange Colorful Floor Cushions Around Sandboxes for Kids
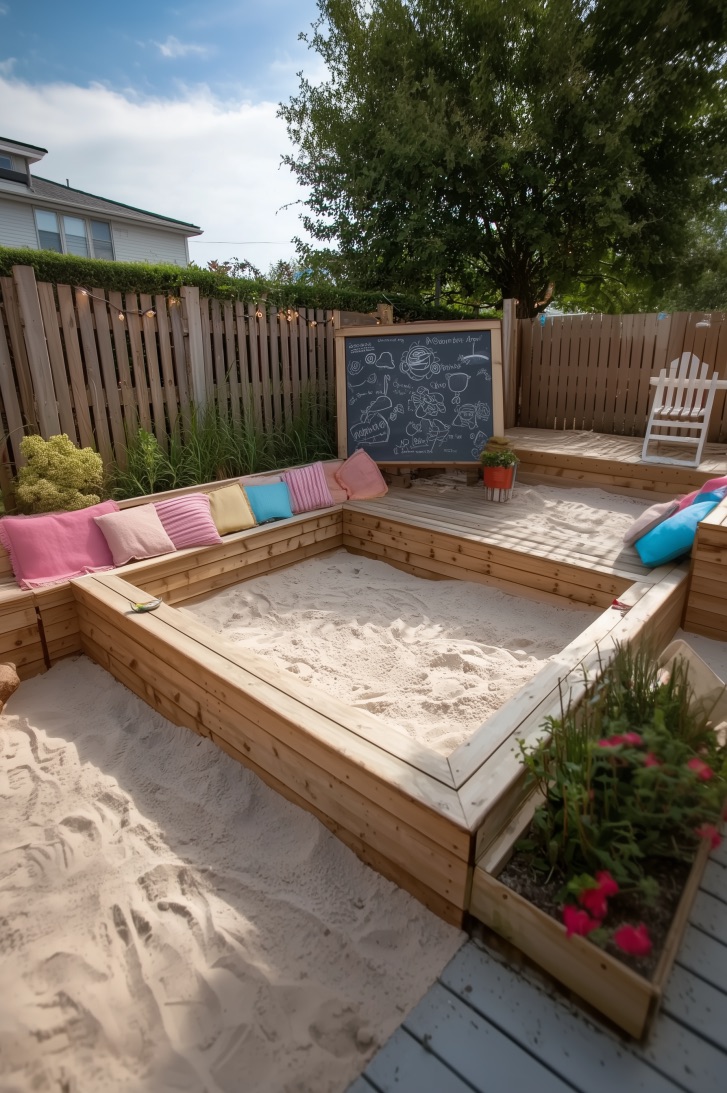
Cushions scattered around a sandbox create a textile archipelago where comfort meets outdoor play. These soft landing zones invite caregivers to settle in for longer supervision sessions while children excavate.
The tradition of hard sandbox borders dates back generations, when parents perched on unforgiving wooden edges or stood hovering nearby. Weatherproof floor cushions shift that dynamic entirely. You sink into a supportive seat at ground level, joining the play space rather than towering above it.
Kids perceive you as more accessible, more present – even when you’re simply reading nearby.
Bright colors also help define the play zone’s boundaries without harsh fencing. To sum it up: cushions soften both the physical space and the social atmosphere around sandbox play.
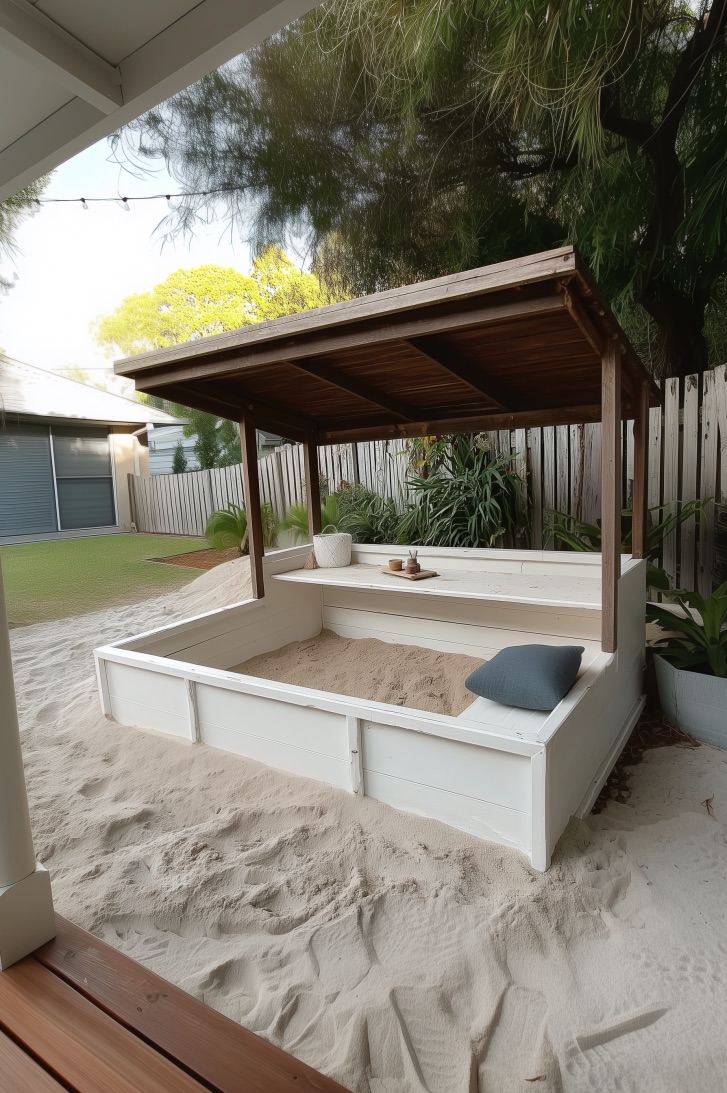
6. Design a Cozy Sandbox Seating Area with Outdoor Cushions
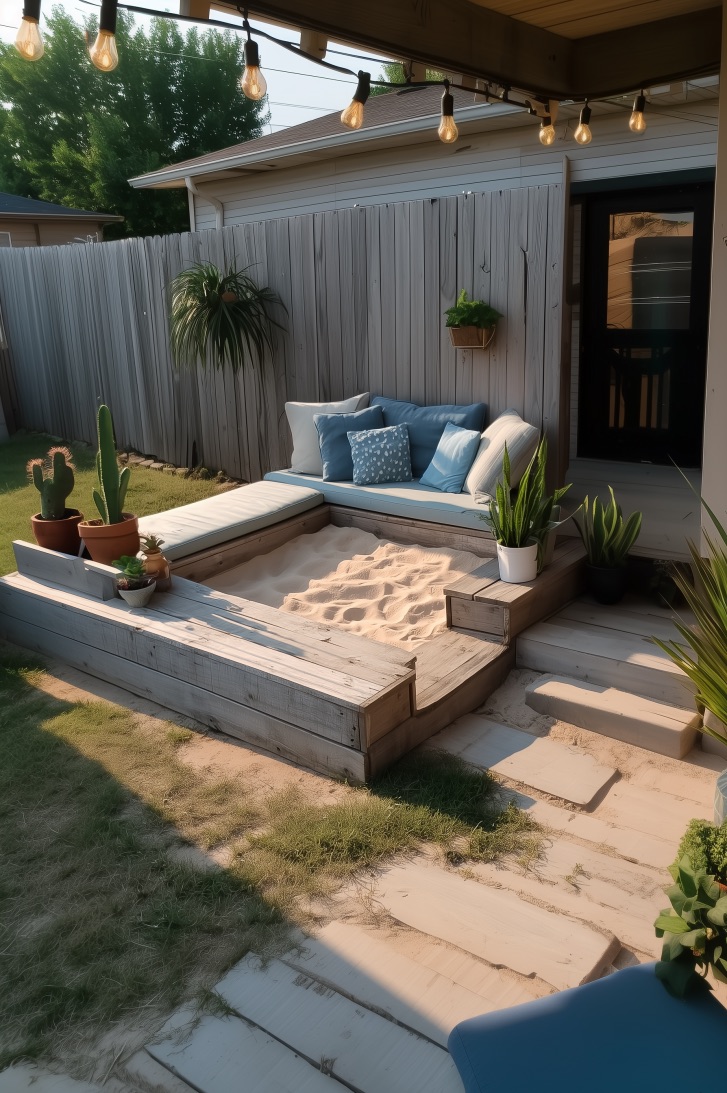
Most families underestimate how much time adults actually spend near sandboxes. You assume you’ll drop off the kids and retreat to the patio, but reality looks different.
Picture a three-year-old who demands you admire every bucket’s contents, or a five-year-old who needs a steady supply of water for moat construction. You end up planted beside that sandbox for forty-minute stretches, perched awkwardly on whatever surface exists. Built-in benches topped with weather-resistant cushions acknowledge this reality.
Wide plank seats along two sides create actual gathering spots where parents, grandparents, or visiting friends can settle comfortably.
Transform your sandbox from a children-only zone into a true family space. Add cushions in complementary colors, install the benches with hinged lids for toy storage, and watch how the area’s social energy shifts.
7. Create Winding Sand Paths Surrounded by Turf for Indoor Fun
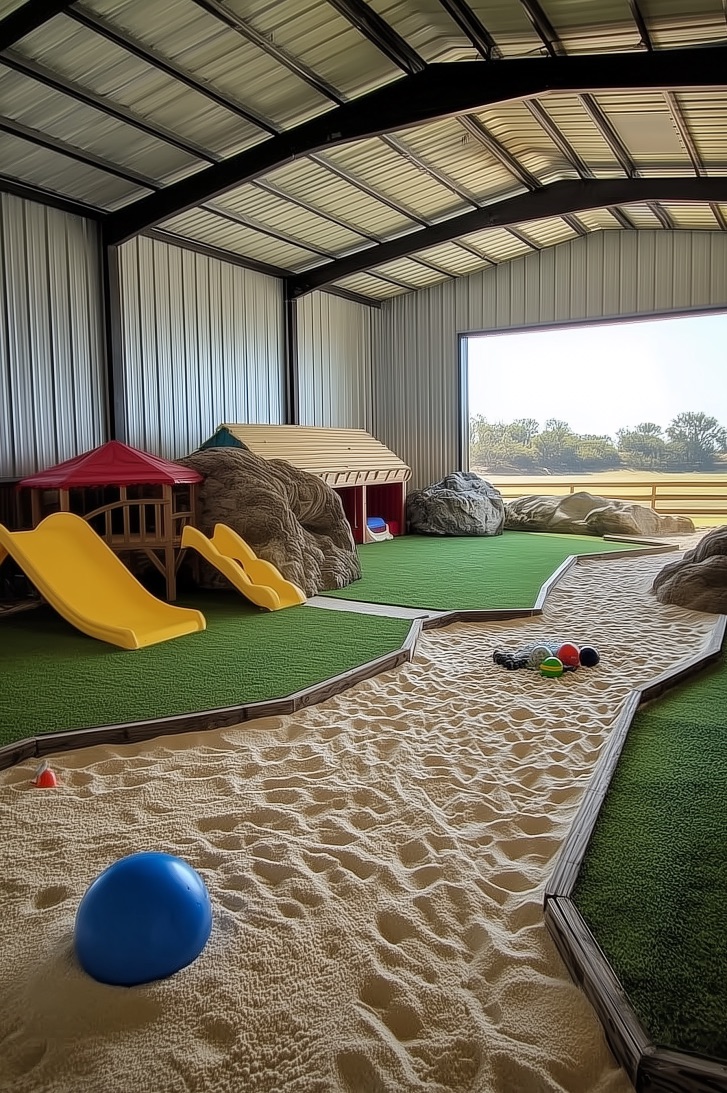
Indoor play spaces face a persistent challenge: containing mess while preserving the sensory experience. Straight sandbox borders feel clinical, like laboratory containment fields rather than play landscapes.
Curved sand paths that meander through artificial turf create the illusion of exploration. Children follow the sandy “river” around gentle bends, discovering play stations positioned along the route.
The grass-like borders provide textural contrast – a different sensation underfoot that helps even toddlers understand boundaries without verbal reminders.
This serpentine layout spreads play across a wider area, reducing crowding when multiple children share the space. It also means sand stays better contained, since kids instinctively follow the defined pathway rather than scattering material in all directions.
You’ll still find stray grains in unexpected corners, but the volume decreases noticeably compared to traditional square boxes.
8. Highlight Geometric Sandbox Borders Using Light Wood for Backyard Charm
Contemporary outdoor design increasingly embraces clean lines and repeating shapes. Hexagonal, octagonal, or even triangular sandbox borders reflect this aesthetic shift.
Light-colored lumber – blonde cedar or whitewashed pine – makes these angular forms pop against green lawns or darker mulch surroundings. The geometric precision creates visual interest even when the sandbox sits empty. Some designers nest multiple geometric shapes, using smaller hexagons for individual digging zones within a larger framed area.
The effect suggests intentional landscape architecture rather than afterthought play equipment. Your yard reads as thoughtfully composed, each element relating to others through shape repetition or color harmony.
Does your outdoor space benefit from this structured approach, or would organic curves suit your landscape better?
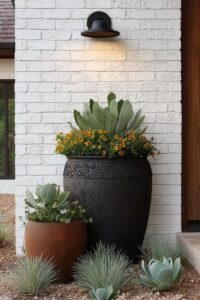
9. Line Sandbox Edges with River Stones for Natural Appeal
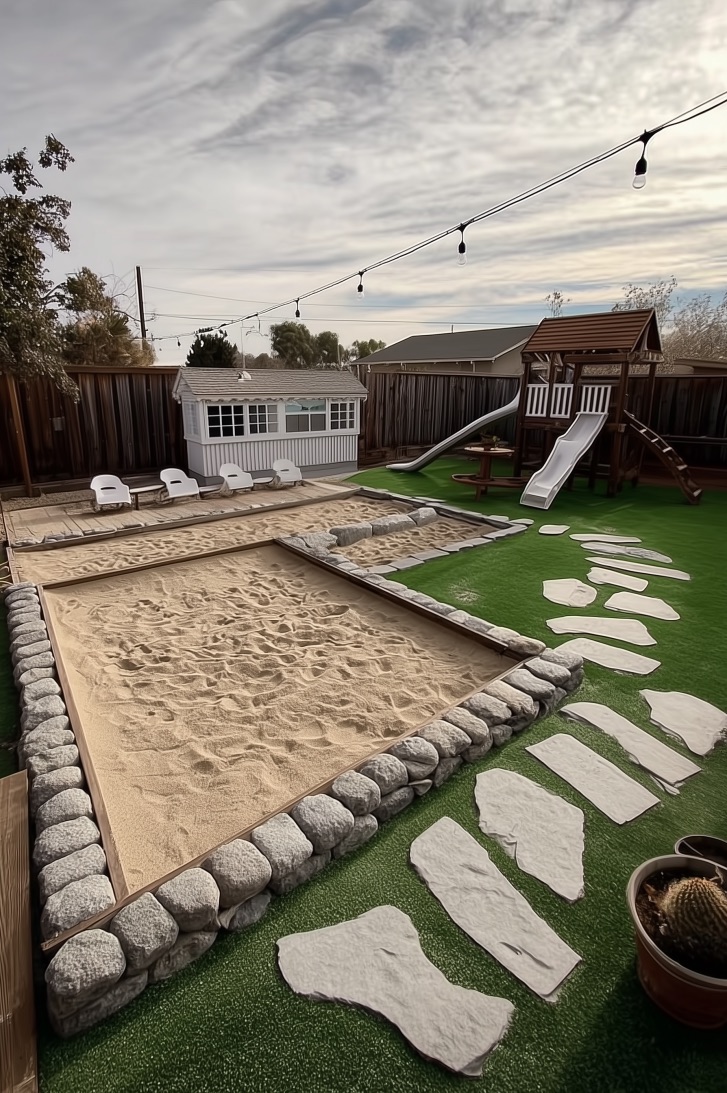
You might expect sandbox borders to involve lumber, plastic edging, or perhaps brick pavers. River stones surprise people.
These smooth, rounded rocks – typically three to five inches in diameter – create a transitional zone between sand and surrounding landscape. They’re too large for toddlers to throw easily, heavy enough to stay put during storms, and varied enough in color to add visual texture.
The stones absorb heat during sunny days, then slowly release that warmth as evening approaches, extending comfortable play time.
Installation requires more effort than simply screwing boards together. You’ll excavate a shallow trench around your sandbox perimeter, lay landscape fabric to prevent weed growth, then arrange stones in an overlapping pattern that discourages sand migration. The labor pays off in durability – these borders don’t rot, crack, or require repainting.
As your children outgrow sandbox play, the stone edging transitions easily to a garden bed border or pathway edge.
10. Feature Interactive Sand Toys for Engaging Outdoor Sandbox Play
Three elements elevate basic sandbox digging into complex play: water channels, mechanical diggers, and modular construction pieces.
Water channels – those plastic troughs and wheels that redirect poured liquid – teach cause-and-effect thinking while keeping hands busy. Mechanical diggers mounted on swivels let kids operate crane-like devices, mimicking construction sites they’ve observed.
Modular pieces like interlocking forms or stackable molds encourage architectural thinking beyond simple bucket castles.
The key lies in rotation. Store half the toys away for a month, then swap them with the active set. This creates novelty without constant purchases, and it seems to reset children’s interest levels. A spinner toy ignored in June becomes fascinating again in August after six weeks out of sight.
What combination works for your family’s play patterns and budget constraints?
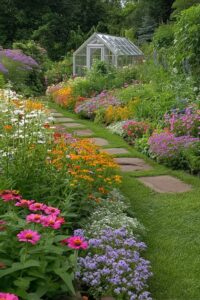
11. Lay Stepping Stones Leading to a Modern Sandbox for Kids
A pathway announces that the sandbox deserves formal arrival. Flat stones spaced at child-sized intervals transform a simple walk across the lawn into a miniature journey.
This approach works especially well when your sandbox occupies a corner or back section of the yard. The stepping stones create anticipation, marking the sandbox as a destination rather than just another yard feature.
Kids often incorporate the path into their play scenarios – it becomes a bridge over lava, a trail through the jungle, or the yellow brick road, depending on that afternoon’s imaginary landscape.
12. Paint Sandbox Exteriors White for a Clean Backyard Look
If you want your sandbox to recede visually rather than dominate the landscape, consider coating its exterior surfaces in crisp white paint.
White reflects light instead of absorbing it, keeping wooden sides cooler to the touch during summer. The neutral tone coordinates with virtually any backyard color scheme, from vibrant flower beds to minimalist modern patios.
Sand’s warm beige tones pop against white backgrounds, making the play surface itself the visual focus rather than the container.
This color choice does require maintenance. You’ll repaint every two or three seasons as weathering dulls the brightness. The tradeoff seems worthwhile for many families, though, since a fresh coat takes just an afternoon and dramatically refreshes the entire play area’s appearance.
Your backyard maintains that well-tended look without major renovation, and the sandbox integrates seamlessly into the overall landscape design.
Conclusion
Your sandbox can be more than a simple box of sand dropped into the yard. These ideas offer starting points for creating a play space that reflects your family’s style while encouraging the kind of outdoor engagement children need. Pick one element that resonates – maybe it’s the shade solution or the stone edging – and build from there.
You’ll craft something far more memorable than generic play equipment, and your kids will spend countless hours proving you made the right choice. Start planning today, and by next weekend you could be watching your vision take shape in your own backyard.