Your front yard deserves more than just grass and a mailbox. The right flower bed transforms your home’s entrance into a welcoming display that neighbors notice and visitors remember.
Curb appeal starts where your property meets the street. With thoughtful planning and a few creative touches, you can craft flower beds that reflect your style while adding lasting value to your home.
1. Highlight Multiple Flower Varieties for Dynamic Full Sun Appeal
Start by counting your options: three, five, or even seven different flower types can share a single sunny bed. Each variety brings its own texture, bloom time, and height to the mix.
This diversity creates visual movement throughout the seasons. When one plant finishes flowering, another steps into the spotlight. Your bed never looks bare or one-dimensional.
Keep an eye on aggressive spreaders, though. Some sun-loving perennials will crowd out their neighbors if you don’t divide them every few years.
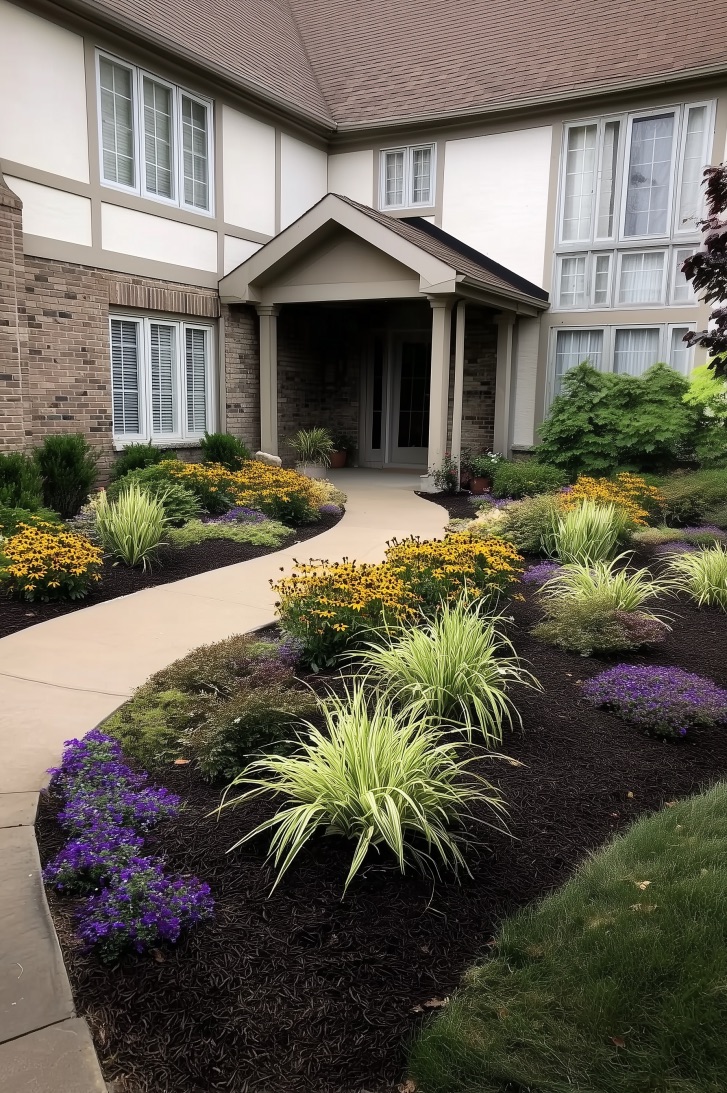
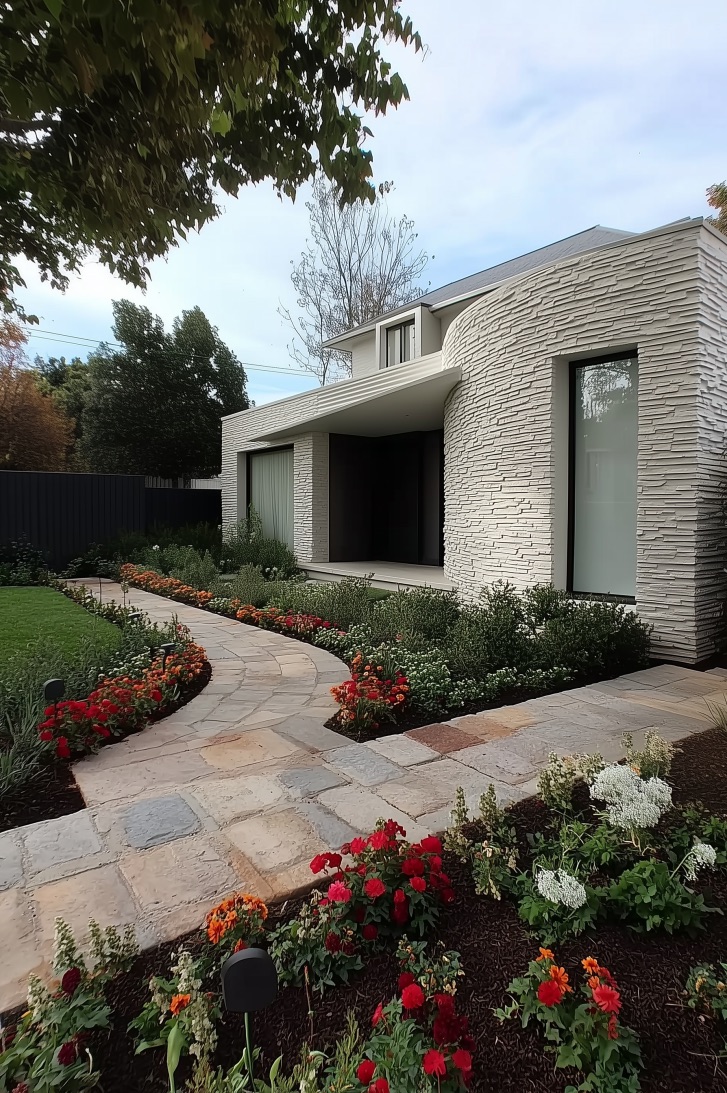
2. Incorporate a Curved Stone Border for Naturalistic Flower Bed Edges
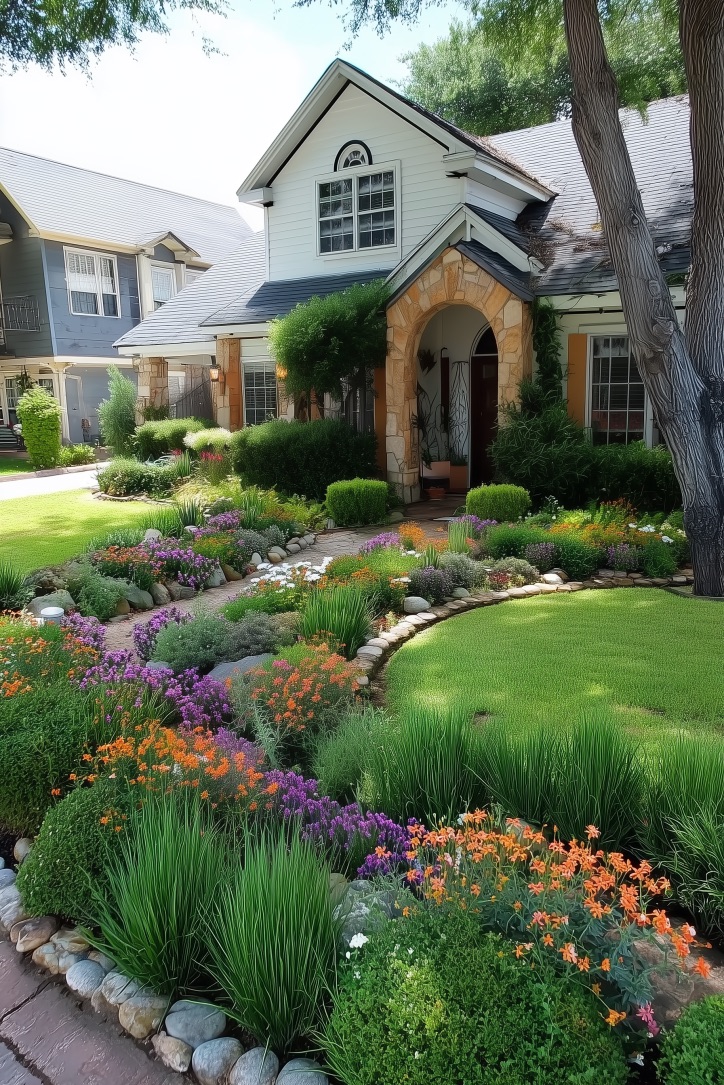
Here’s something most people don’t realize: straight lines rarely exist in nature. Rivers meander, coastlines curve, and forest edges follow irregular paths – which is why curved stone borders feel so organic.
You can source stones from a local quarry or landscape supplier. Flat-topped river rocks work beautifully, though rounded fieldstones give a more rustic appearance. Lay them end to end, allowing the curve to flow gently rather than turning sharply.
The installation takes an afternoon at most. Dig a shallow trench along your marked curve, nestle each stone firmly into the soil, and backfill around the edges. Some gardeners secure stones with landscape adhesive, but gravity and proper placement usually suffice.
Walk your front yard this weekend and sketch out where a curve might soften your home’s architecture. Your flower bed will thank you with a more grounded, natural presence.
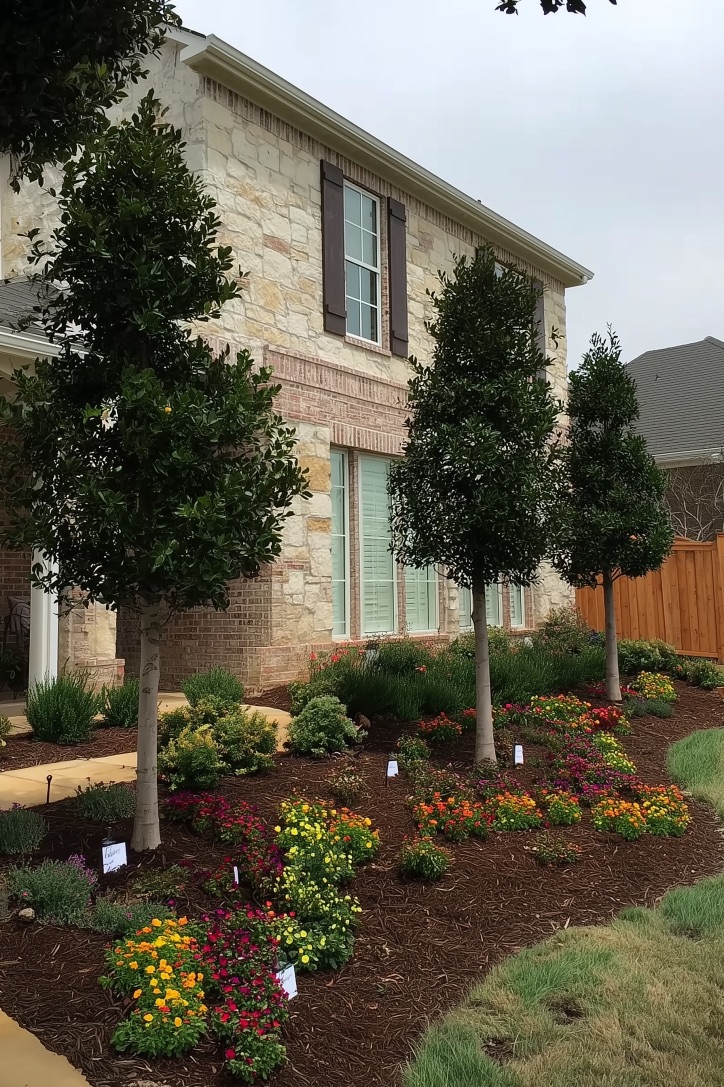
3. Frame Tall Shrubs to Create Structured Flower Bed Layout
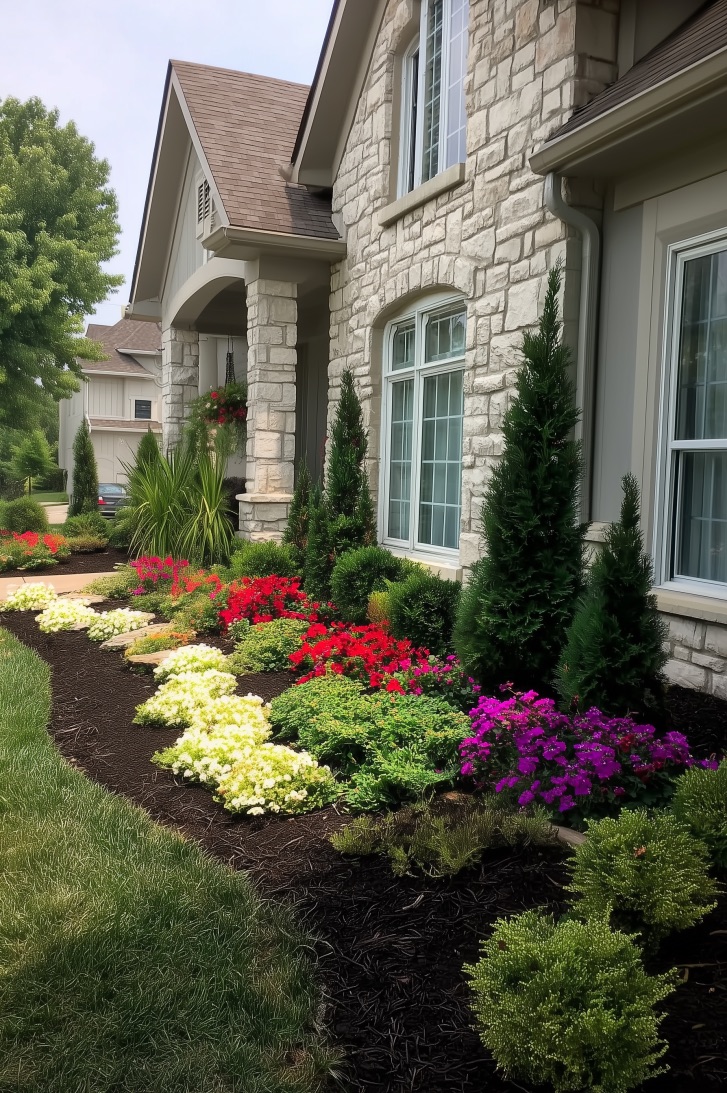
Let’s be honest: flowers can look lost without something substantial backing them up. They wave around, flop over after rain, and generally act like unruly teenagers at a formal dinner.
Tall shrubs provide that missing backbone. Plant evergreens like junipers or boxwoods at regular intervals along the back of your bed, then fill the foreground with seasonal bloomers. The shrubs anchor the composition while the flowers add punch and personality.
Consider a bed flanking your front door: three evenly-spaced dwarf Alberta spruces form the back row, with waves of purple salvia and yellow coreopsis dancing in front. The spruces stay green year-round while the flowers rotate through the growing season.
Shrubs bring permanence to flower beds that otherwise reinvent themselves with every season.
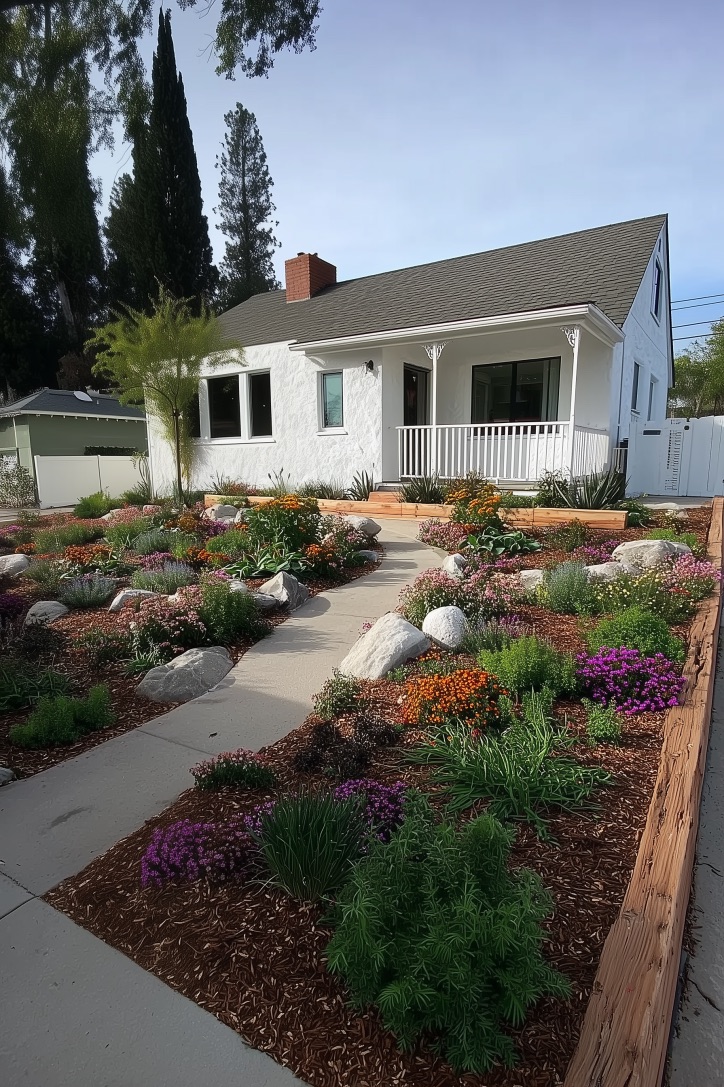
4. Accent Artificial Turf Islands for Effortless Low Maintenance Charm

Notice how some modern landscapes use small patches of green as design elements rather than carpeting everything. Artificial turf islands scattered through a flower bed deliver that crisp, manicured look without weekly mowing.
These synthetic patches work particularly well in xeriscape designs or arid climates where maintaining real grass feels like fighting nature. You install them just like pavers: excavate a few inches, add a gravel base, and lay the turf. Edge the islands with steel or aluminum for clean separation from surrounding mulch.
The contrast catches the eye immediately. Vibrant flowers pop against the uniform green, and the turf’s geometric shape provides structure. You’ll never edge, fertilize, or water these sections – a significant time savings when summer heat arrives.
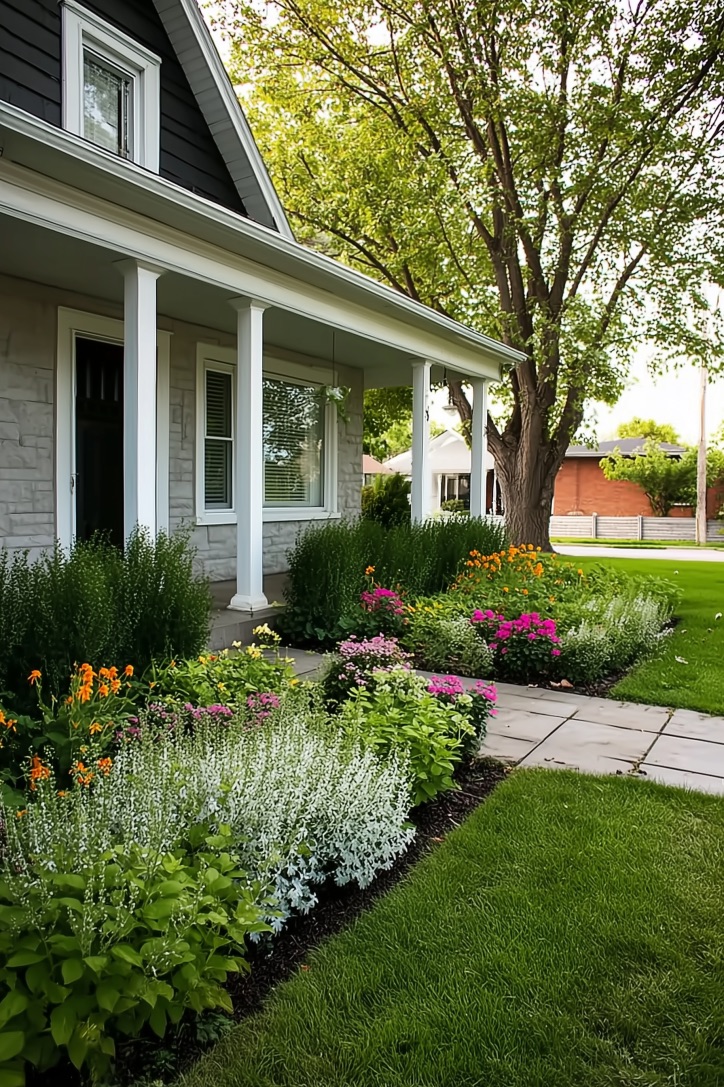
5. Showcase Layered Planting Heights for Striking Flower Bed Design
Think in tiers when you arrange your flower bed. Place the shortest plants at the front edge, medium heights in the middle zone, and the tallest selections toward the back or center.
This layering prevents tall specimens from hiding shorter ones – a common mistake that leaves half your investment invisible from the street. It also creates depth, making even a narrow bed feel fuller and more intentional. Your eye travels through the landscape rather than skipping across a flat plane.
Layering works with foliage colors too. Silver-leaved artemisia in front, green hostas mid-level, and burgundy ninebark in back generates contrast beyond just height. The interplay of sizes and shades keeps the composition interesting even between bloom cycles.
Expect to see more vertical diversity in residential landscapes as homeowners move away from single-row plantings. Layered beds photograph better, age more gracefully, and adapt to changing light conditions throughout the day.
6. Mix Bright Annuals and Perennials for Continuous Flower Bed Color
If you want blooms from April through October, you need reinforcements. Perennials alone create gaps – spectacular in their moment, then finished.
Annuals fill those gaps with relentless color. Plant perennials as your foundation: they return each year and establish strong root systems. Then tuck annuals into empty spots each spring. Petunias, marigolds, and zinnias blast through summer heat while your perennials gather strength for their next performance.
This combination approach balances investment and impact. You spend less replacing a few flats of annuals than installing all new perennials, yet your bed maintains that just-planted freshness. The strategy also lets you experiment with new color schemes without committing to permanent changes.
Moving from here, consider how these layers of bloom timing connect to the physical structure you create with edging and borders.
7. Line Flower Beds with Raised Stone Walls for Elegant Diy Structure

Building on the edging concepts we’ve explored, raised walls add vertical dimension that flat borders can’t match. Stack natural stone or concrete blocks two or three courses high to create a planting platform.
These elevated beds solve drainage problems on flat lots while giving your flowers better visibility. You backfill with quality soil, creating optimal growing conditions even if your native earth disappoints. The walls also double as casual seating during garden parties – an unexpected bonus most homeowners discover after installation.
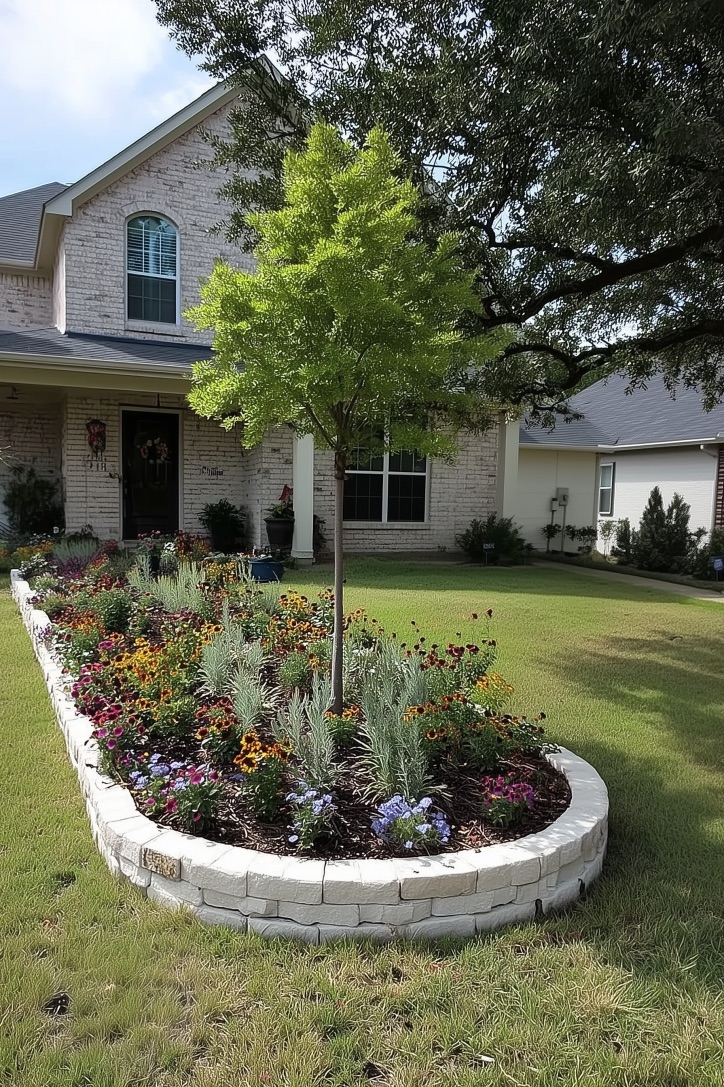
8. Install a Circular Stone Feature for Unique Flower Bed Decor
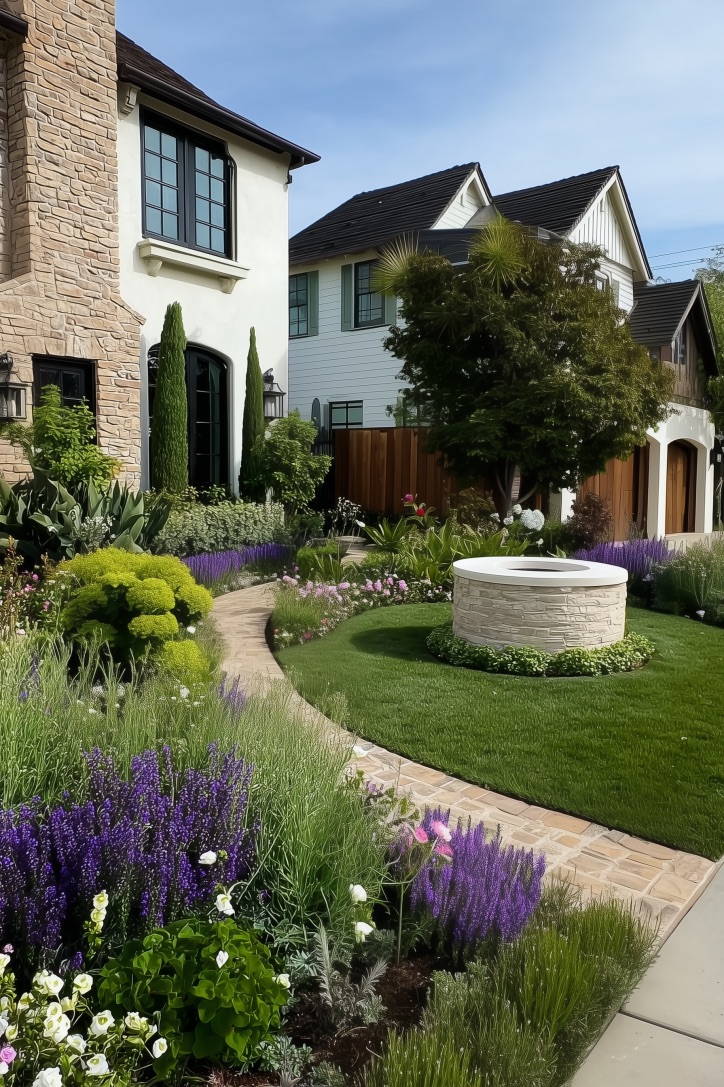
You probably expected another rectangular bed suggestion. Break that pattern with a circular stone feature that commands attention right in your front lawn.
Mark the circle using a stake and string compass, then excavate six inches deep. Line the perimeter with stacked stone, creating a raised wall that defines the planting area. Fill the center with amended soil and arrange flowers in concentric rings – tallest in the middle, graduating down toward the edges.
Circles soften angular architecture and create a focal point that draws the eye from multiple viewing angles. Unlike linear beds that disappear when viewed end-on, circular features maintain their visual impact from every approach. They work especially well on corner lots where traffic passes from multiple directions.
Here’s a useful tip: keep the diameter under eight feet for easier maintenance. Anything larger becomes difficult to reach the center without stepping into the bed.
9. Arrange Straight Edged Flower Beds for Symmetrical Garden Layout

Curved beds are beautiful, but sometimes your home’s architecture demands structure. Colonial, Georgian, and contemporary homes often look best with geometric precision rather than organic shapes.
Run beds parallel to your foundation with military straightness. The formality echoes your home’s clean lines and creates a sense of order that feels intentional rather than accidental. Repeat the straight edges on both sides of your walkway for symmetrical balance that traditional architecture craves.
10. Define Flower Bed Spaces Using Pine Straw for Cohesive Borders
Pine straw creates natural boundaries between planting areas and lawn without hard edging. The long needles interlock, resisting wind and staying put better than shredded mulch.
Spread a three-inch layer around your plantings, letting it extend beyond the bed edge by several inches. This soft transition blurs the line between garden and grass, creating a more integrated landscape. Pine straw also acidifies soil slightly as it decomposes – a bonus if you’re growing azaleas, hydrangeas, or other acid-loving plants.
11. Edge Flower Beds with Large Rocks for Naturalistic Rock Accent
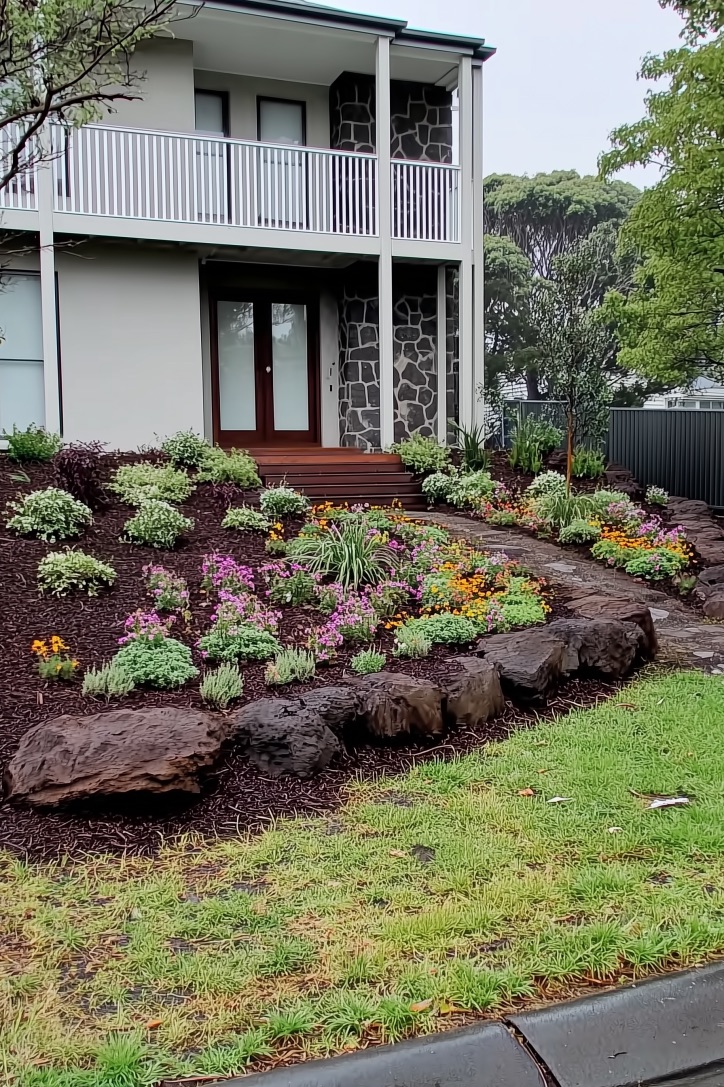
Small pebbles look fussy and migrate everywhere. Large rocks stay put and make bold statements.
Select boulders or slab rocks weighing at least fifty pounds each – heavy enough that gravity keeps them exactly where you place them. Space them irregularly along your bed edge, some tight together, others standing alone. This randomness mimics how stones naturally occur in fields and mountainsides.
The substantial size brings a different energy than trim little edging stones. Large rocks suggest permanence and age, as if they’ve witnessed decades of garden evolution. They also provide textural contrast against soft flowers and foliage, grounding the composition.
Don’t underestimate installation challenges, though. You’ll need a helper, a hand truck, and possibly a small pry bar to position rocks weighing more than you can comfortably lift. Back injuries aren’t worth the aesthetic upgrade.
12. Plant Hardy Groundcovers for Effortless Flower Bed Ideas
Groundcovers are the carpet of your outdoor living room. They fill horizontal space, suppress weeds, and require minimal fussing once established.
Selections like creeping thyme, sedum, or ajuga spread steadily without becoming invasive. They soften bed edges, fill gaps between larger plants, and provide textural variety at ground level. Many groundcovers bloom too – a delightful bonus when creeping phlox explodes in spring pastels or sedum develops autumn burgundy tones.
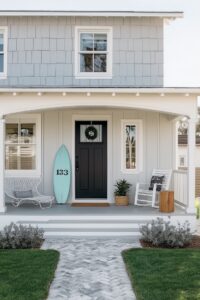
13. Flank Walkways with Boxwood Hedges for Formal Flower Bed Border

You can transform an ordinary front walk into a grand entrance with matching boxwood rows. Plant dwarf or compact varieties about eighteen inches apart, creating low hedges that parallel your path.
The evergreen foliage provides year-round structure while the uniform repetition conveys formality. Clip the hedges twice yearly to maintain crisp lines. Behind this green framework, plant seasonal flowers that change with the calendar – tulips in spring, lantana in summer, mums in autumn.
14. Direct Pathway Attention with Flower Bed Lighting Decor
Just as accent lights highlight museum paintings, landscape lighting elevates flower beds from daytime-only features to evening attractions. Uplights and path lights serve different purposes but complement each other beautifully.
Position small uplights at the base of specimen plants or architectural shrubs to cast dramatic shadows on your home’s facade. These create depth and intrigue after sunset. Meanwhile, low path lights along your walkway improve safety while illuminating nearby flower bed edges with ambient glow.
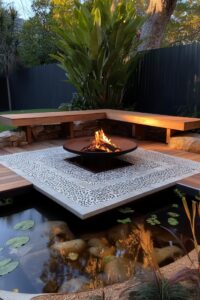
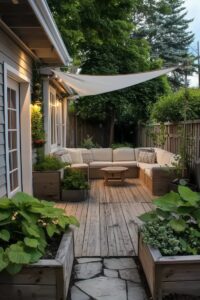
15. Add a Contemporary Bench for Inviting Flower Bed Seating
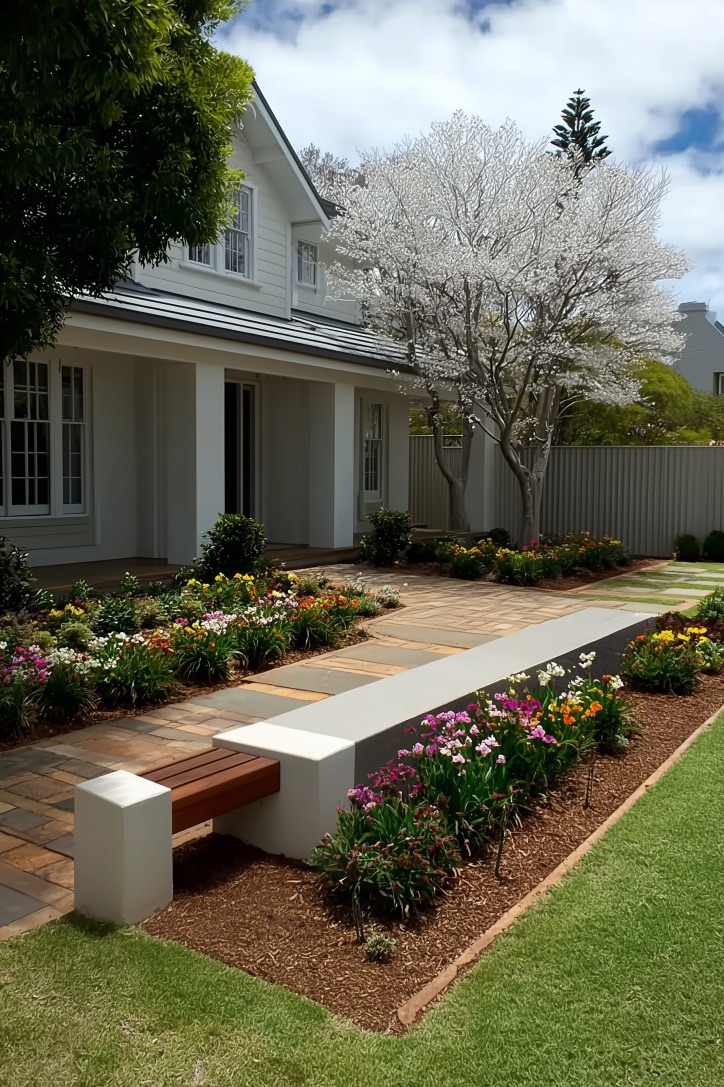
Why should flower beds only please the eyes? A strategically placed bench transforms a planting area into an outdoor room where you actually want to linger.
Choose a sleek metal or wood design that complements your home’s style, then nestle it into or beside your flower bed. Surround the bench with fragrant plants – lavender, roses, or sweet alyssum – so sitting becomes a multi-sensory experience.
Suddenly your front yard isn’t just a view from the street; it’s a destination where you might enjoy morning coffee or evening conversation.
16. Paint Flower Bed Edges White for Crisp Border Definition

Here’s a trick that divides opinions: painting a thin white line along the edge where your flower bed meets the lawn. Some designers call it dated; others swear it brings unmatched clarity.
The technique works by creating a visual stop sign that defines territory. Use exterior latex paint and a small brush to mark the boundary, refreshing it annually. The white line disappears beneath flowers and mulch but remains visible enough to guide your mower and prevent accidental plant decapitation.
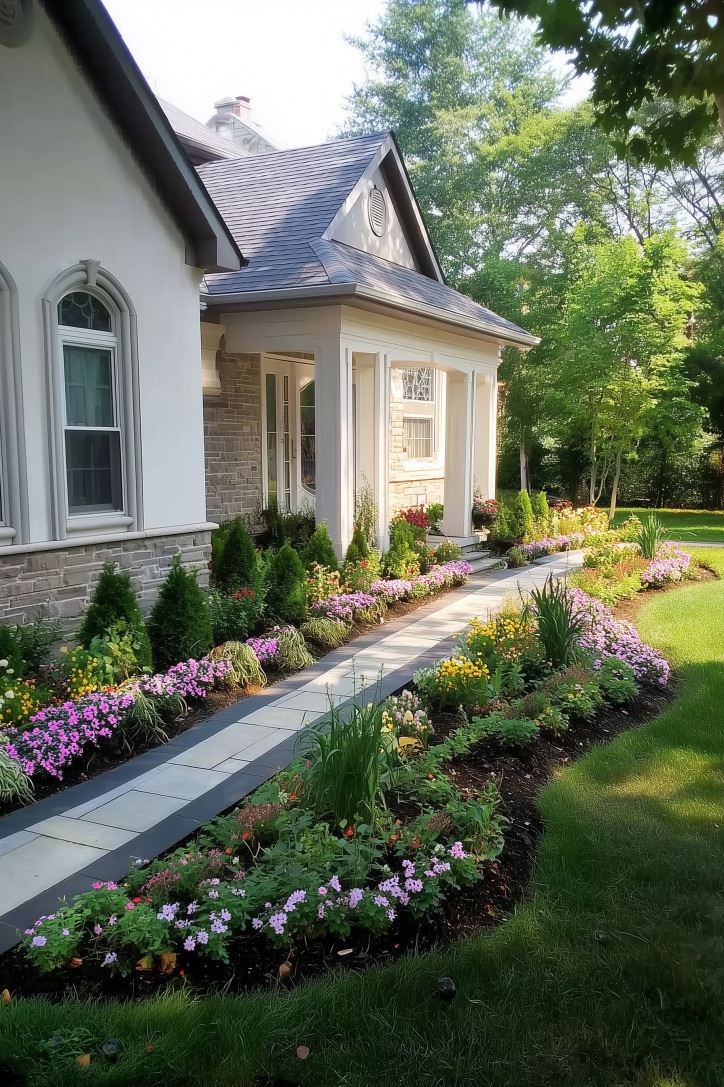
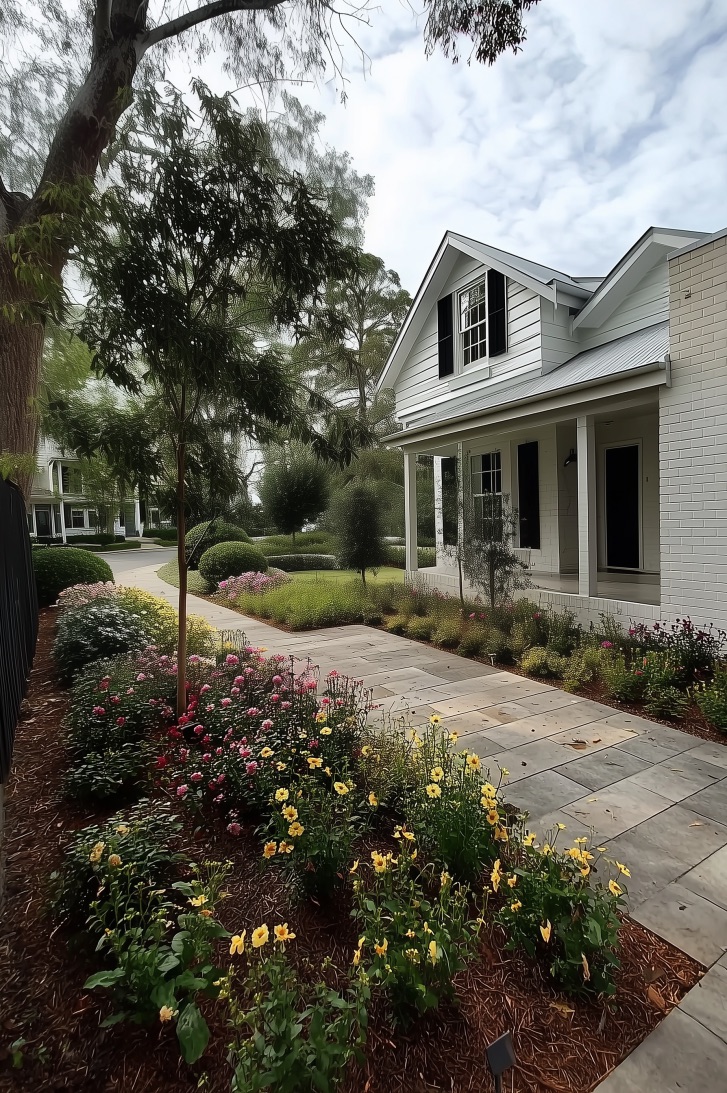
17. Integrate Vibrant Flower Clusters Along Pathways for Eye Catching Design
Most gardeners focus so intently on foundation beds that they ignore the journey to the front door. Pathway plantings are frequently overlooked, yet they’re what visitors experience most intimately.
Mass bright annuals – impatiens, begonias, or geraniums – in repeated clusters flanking your walk. The repetition creates rhythm while the saturation of color makes even a short path feel special. Choose one or two colors maximum to avoid a chaotic carnival atmosphere. Red and white, or purple and yellow, deliver impact without overwhelm.
This approach transforms a functional necessity into a memorable arrival experience. Guests slow down to appreciate the flowers, arriving at your door already charmed by the thoughtfulness evident in your landscape.
18. Dot Mulched Beds with Solar Lights for Subtle Nighttime Accent
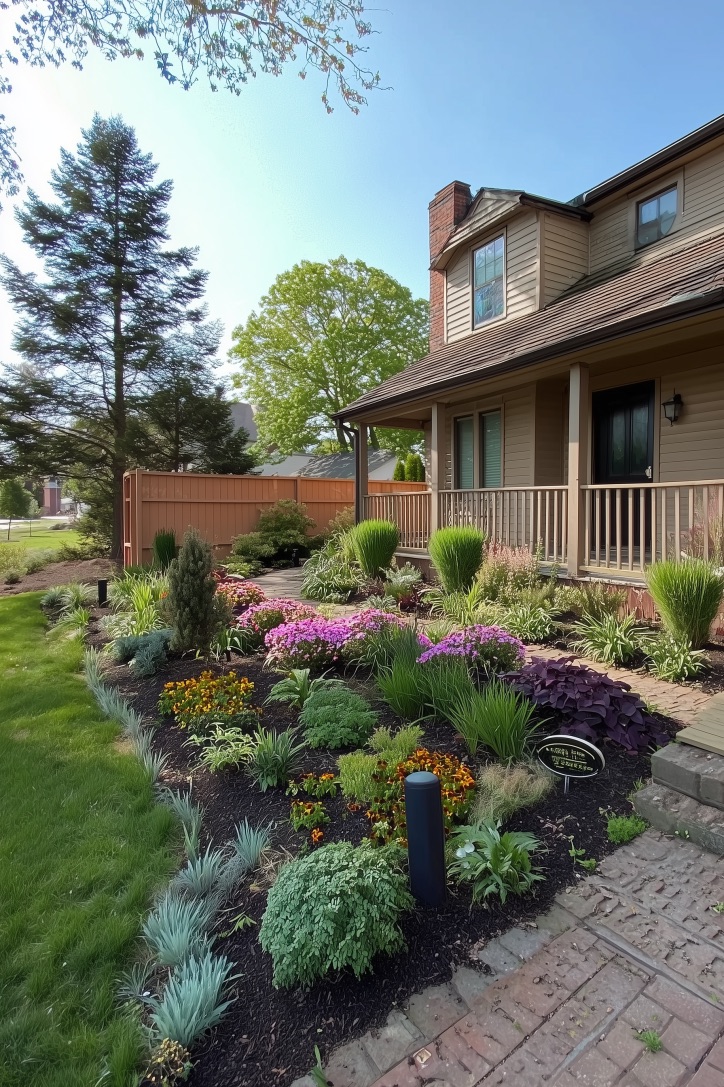
Solar lighting has evolved from gimmicky garden gadgets into genuinely attractive accents. Modern homeowners increasingly choose these eco-friendly markers to extend their garden’s beauty past dusk.
The technology works seamlessly: solar panels charge during daylight, then LED bulbs illuminate automatically when darkness falls. No wiring, no electricity bills, no complicated installation. Push the stakes into mulched areas throughout your flower bed, spacing them six to eight feet apart for even distribution.
The warm glow highlights flower bed shapes and creates safe navigation along pathways. Quality matters here – cheap units fade quickly or provide disappointing brightness. Invest in models with bronze or copper finishes that complement natural landscapes better than plastic ever will.
Here’s a practical tip: remove solar lights before mulching or weeding to avoid accidental damage, then replace them when you finish.
19. Use Oversized Stepping Stones for Functional Flower Bed Pathways
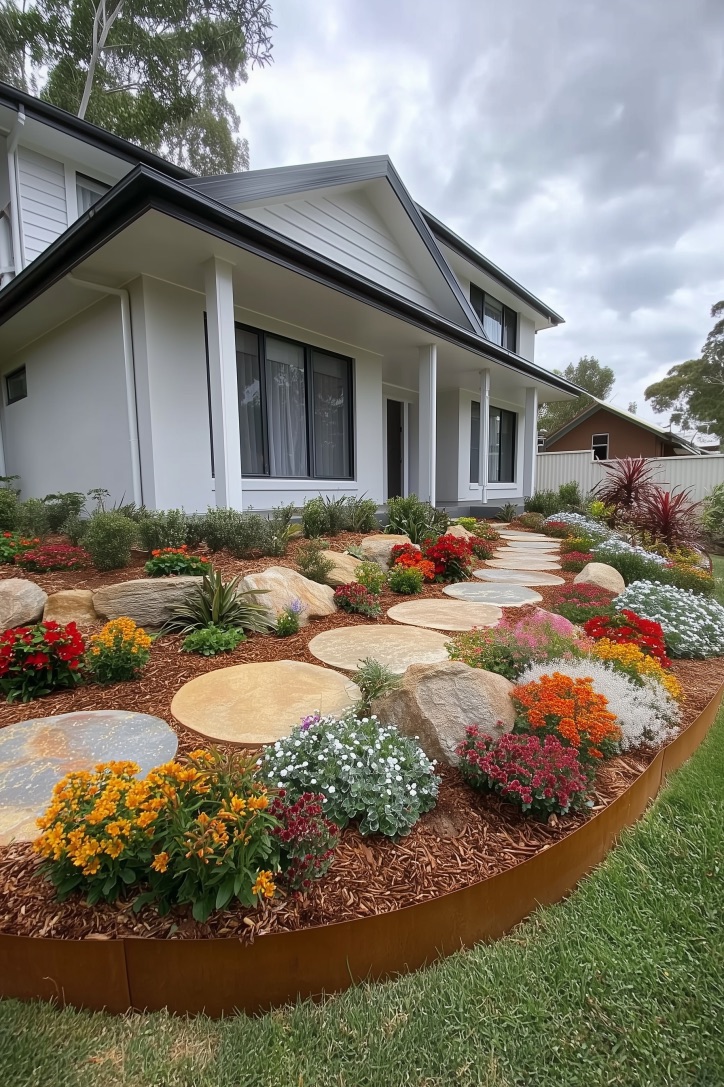
You need to maintain your flower beds, but walking directly on soil compacts it and damages plant roots. Oversized stepping stones solve this problem while adding sculptural interest.
Select stones at least eighteen inches across – large enough for stable footing – and place them strategically through deeper beds. The stones become part of the design rather than intrusive necessities. Choose natural flagstone for irregular organic shapes, or use cut pavers if your landscape leans modern.
The pathway element introduces accessibility without disrupting the flower display. You can reach center plants for deadheading, weeding, or dividing without gymnastic contortions. As garden design trends toward more intensive plantings that maximize every square foot, these access points will become standard features rather than optional extras.
20. Group Matching Shrubs for Unified Front Yard Layout
Nothing says “I had a plan” quite like repeating the same shrub in strategic locations. It’s like the universe decided your yard needed a visual theme song.
Repetition creates cohesion across your front landscape. Plant the same evergreen or flowering shrub at opposite corners of your house, or space three identical specimens evenly along your foundation. The eye recognizes the pattern, which reads as intentional design rather than random plant collection.
This grouping strategy offers another advantage: bulk purchases often cost less per plant than buying individually. Purchase five of the same hydrangea instead of five different shrubs, and you might save twenty percent while creating stronger visual impact.
Just don’t repeat plants that you can barely keep alive. Matching dead shrubs won’t impress anyone except perhaps fungi enthusiasts.
Transform Your Front Yard Starting Today
Your front yard waits for the personality only you can give it. Start with one or two ideas that resonate with your home’s character and your available time. Small changes – a curved border, a splash of annuals, a strategically placed boulder – accumulate into something neighbors admire and you genuinely enjoy.
The best flower bed is the one you’ll actually create, so grab your shovel and begin.